Naming and saving colour palettes in Affinity designer saves time and improves the workflow of your brand. There are 3 main ways to create and save colour palettes in Affinity Designer. You can add a document palette or a system palette, but for this tutorial we will only add an application palette.

creating color platte from an image
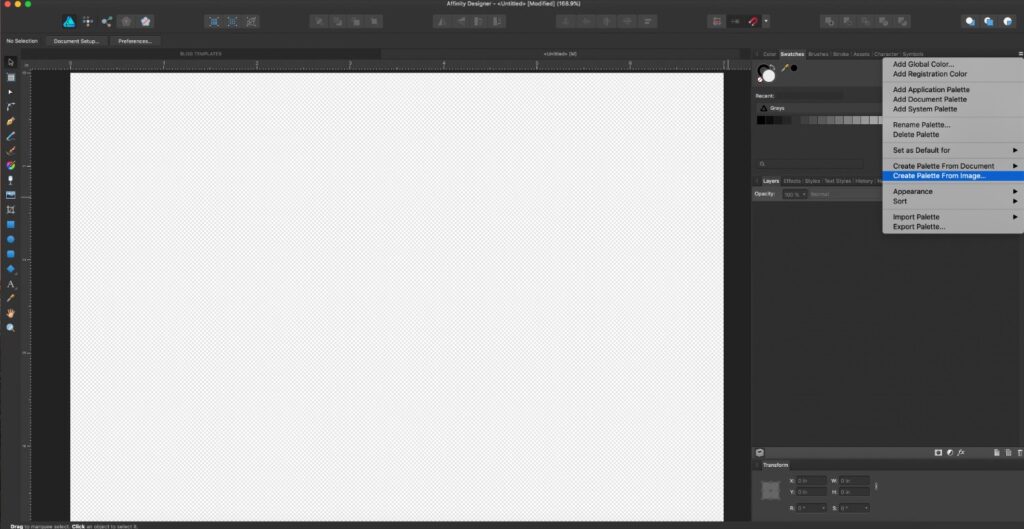
With the Affinity Designer app open, click on the Swatches tab in the Studio section
[View > Studio > Swatches].
On the right side of the tab, you will see a small white horizontal line and a small arrow-like icon in the bottom right-hand corner. Click on that icon, then ‘Create palette from image…’ Click on the ‘Create palette from image…’ icon.
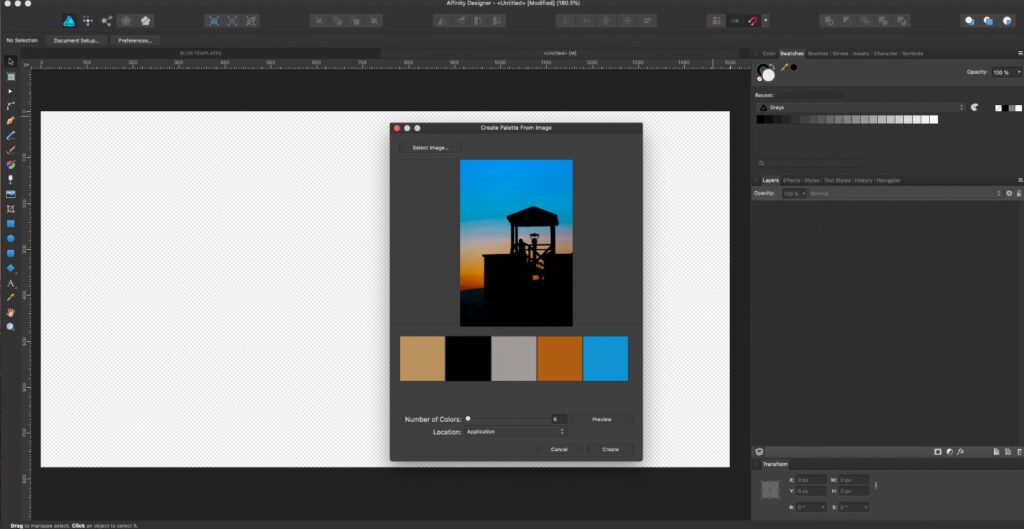
Click on the ‘Select image’ box in the top left-hand corner of the new window and open the image you want to use.
You will be presented with options on how many colours to put in the palette from that image. Set the Location box to ‘Application’. This will allow you to access the palette whenever you are using the Affinity Designer application.
Click ‘Create’.

